Buddh International Circuit layout & records
| Buddh Circuit Details | Buddh Lap Record | Buddh Pole Record | |||
|---|---|---|---|---|---|
| Location: | Greater Noida, India | Lap Record: | 1:27.249 min | Record Pole: | 1:24.178 min |
| Event: | Indian Grand Prix | Date: | 30 October 2011 | Date: | 29 October 2011 |
| Used Since: | 2011 | F1 Driver: | Sebastian Vettel | F1 Driver: | Sebastian Vettel |
| Type: | Closed Cricuit | F1 Car: | Red Bull RB7 Renault | F1 Car: | Red Bull RB7 Renault |
| Lap Dist.: | 5.125 km | Speed: | 211.464 km/h | Speed: | 219.178 km/h |
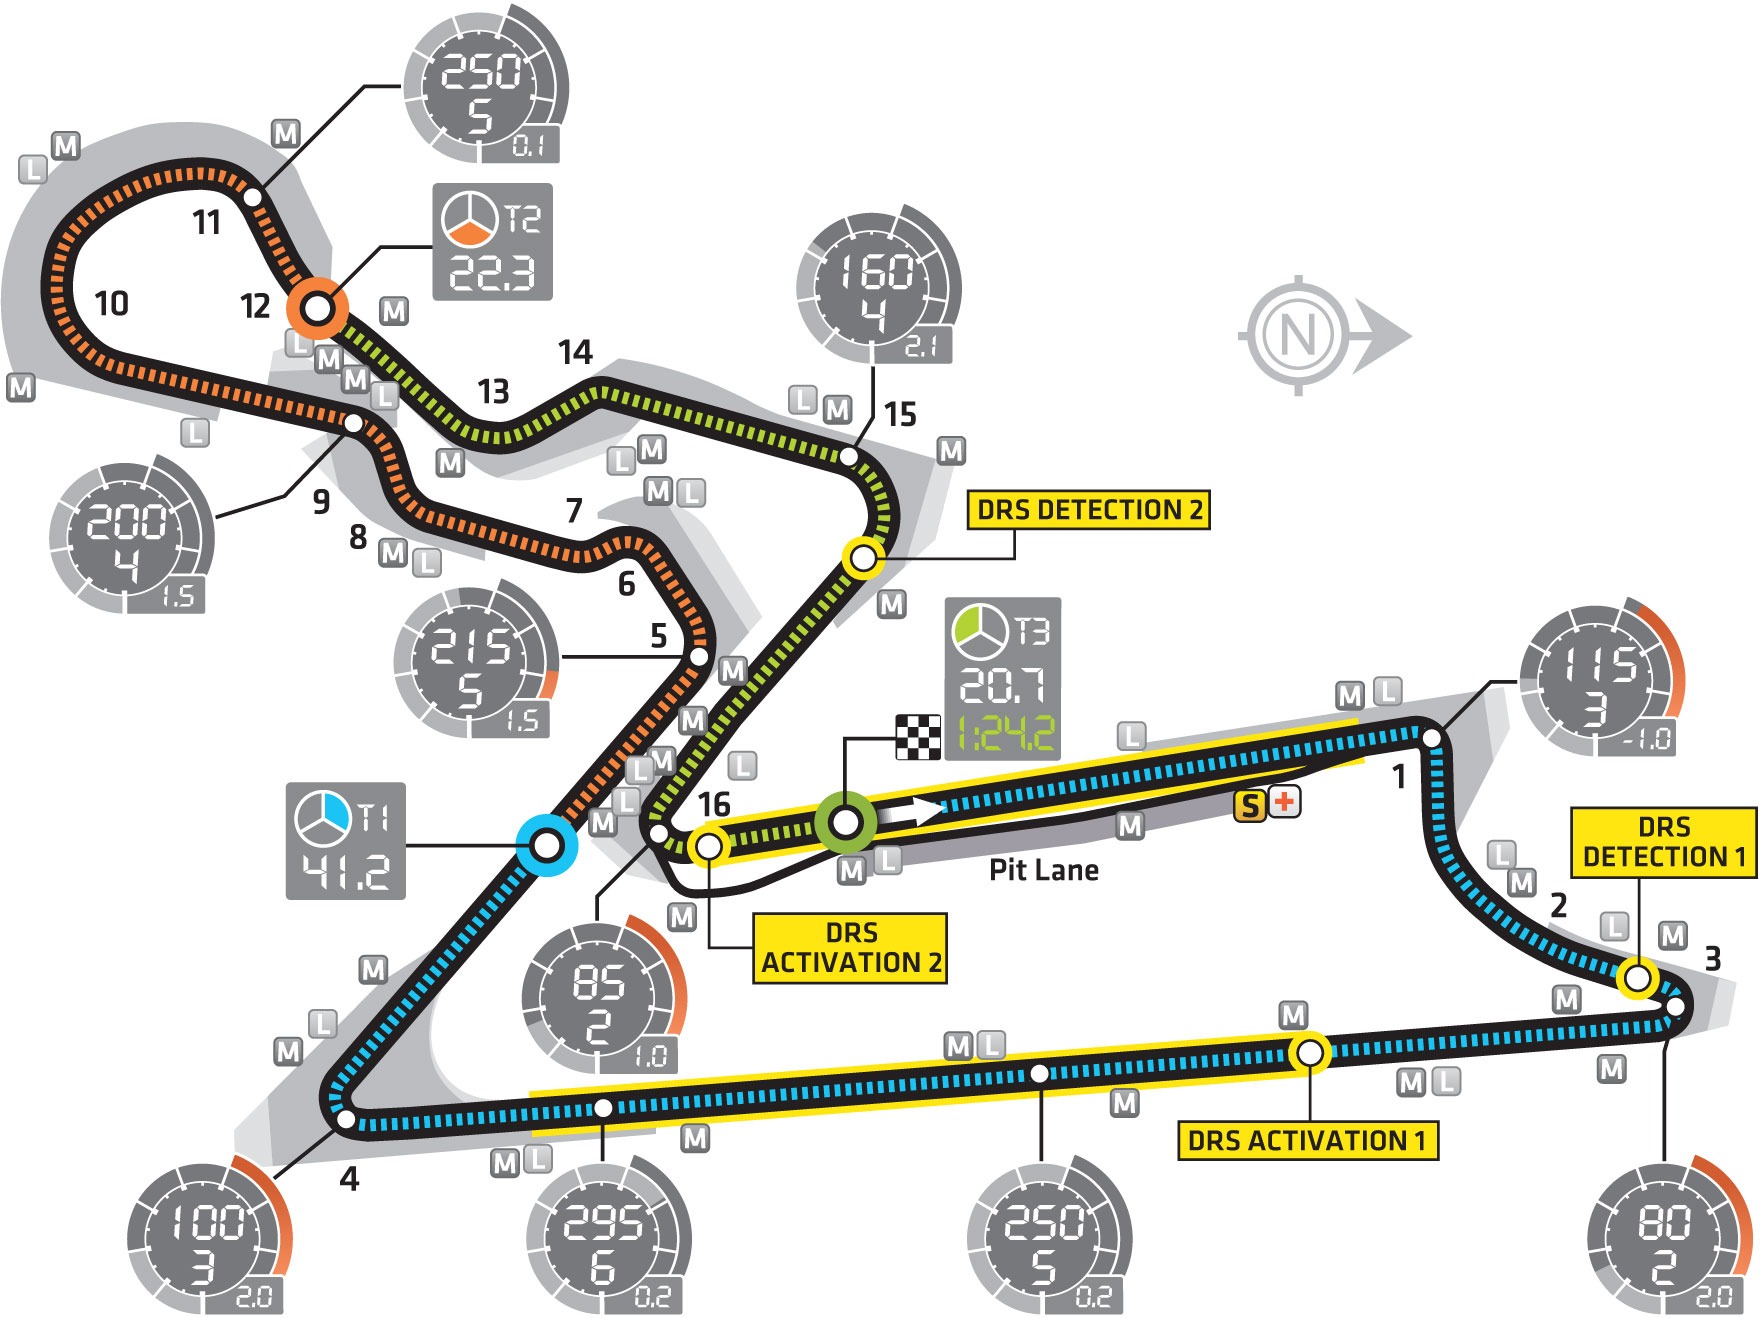
Buddh International Circuit Layout


Description
Buddh International Track: Three sections in detail
Turn 1
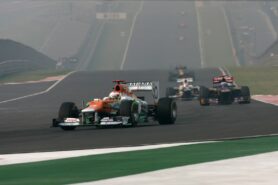
After the start-finish straight the track falls sharply downhill for turn 1 before rising again for turn 3. This change in gradient compresses both the driver and the car into the ground, generating huge vertical g-forces. The lubricants in the system will therefore also be squashed towards the bottom of the tank, which can in turn make pick-up difficult.
Back straight (between Turns 3 and 4)
The Buddh circuit features three long straights; the pit straight, the long run between turns 3 and 4 and the shorter spurt from there down to turn 5. The longest straight is the back straight, a huge 1.2km, with the engine running at wide open throttle for over 15secs. Interestingly this straight also features an altitude change with the track going downhill to the midway point of the straight before then climbing back up. The gradient changes will have an effect on gearing, which will need to take into account the dip and crest.
Turns 10 and 11
The second part of the track is much more twisted, shifting the emphasis from outright power to engine drive-ability. Turns 10 and 11, a radial turn with a profile similar to the Spoon Curve in Japan, is one of the most challenging. The drivers ‘play’ with the pedal over a relatively prolonged period as they attempt to find the limit of the car. This sustained period of lateral G will also test the engine’s oil and fuel systems to their limits.
Podiums
F1 Podium Winners on Buddh Circuit
| Year | Race | Date | Top 3 Drivers | Teams | Laps |
|---|---|---|---|---|---|
| 2013 | 2013 Indian F1 GP | October 27 | 60 | ||
| 2012 | 2012 Indian F1 GP | October 28 | 60 | ||
| 2011 | 2011 Indian F1 GP | October 30 | 60 |
Driver Ranking
Driver Ranking Buddh Circuit
| Driver | GP | 1st | 2nd | 3rd | Pod | Pole | FL | Avg Grid | Avg Pos | Points | |
|---|---|---|---|---|---|---|---|---|---|---|---|
| 1 | 3 | 3 | 0 | 0 | 3 | 3 | 1 | 1.0 | 1.0 | 75 | |
| 2 | 3 | 0 | 1 | 1 | 2 | 0 | 0 | 5.3 | 5.3 | 33 | |
| 3 | 3 | 0 | 1 | 0 | 1 | 0 | 1 | 6.0 | 7.0 | 28 | |
| 4 | 3 | 0 | 1 | 0 | 1 | 0 | 0 | 6.3 | 6.3 | 26 | |
| 5 | 3 | 0 | 0 | 1 | 1 | 0 | 0 | 2.7 | 9.0 | 27 | |
| 6 | 2 | 0 | 0 | 1 | 1 | 0 | 0 | 14.0 | 6.0 | 17 | |
| 7 | 3 | 0 | 0 | 0 | 0 | 0 | 0 | 3.7 | 5.7 | 26 | |
| 8 | 3 | 0 | 0 | 0 | 0 | 0 | 0 | 4.7 | 10.0 | 20 | |
| 9 | 2 | 0 | 0 | 0 | 0 | 0 | 1 | 6.5 | 7.0 | 12 | |
| 10 | 3 | 0 | 0 | 0 | 0 | 0 | 0 | 12.3 | 13.0 | 11 | |
| 11 | 2 | 0 | 0 | 0 | 0 | 0 | 0 | 12.5 | 13.5 | 10 | |
| 12 | 1 | 0 | 0 | 0 | 0 | 0 | 0 | 10.0 | 8.0 | 4 | |
| 13 | 2 | 0 | 0 | 0 | 0 | 0 | 0 | 9.5 | 13.5 | 4 | |
| 14 | 2 | 0 | 0 | 0 | 0 | 0 | 0 | 10.5 | 9.0 | 4 | |
| 15 | 3 | 0 | 0 | 0 | 0 | 0 | 0 | 13.3 | 11.0 | 4 | |
| 16 | 2 | 0 | 0 | 0 | 0 | 0 | 0 | 13.5 | 11.0 | 1 | |
| 17 | 3 | 0 | 0 | 0 | 0 | 0 | 0 | 16.3 | 13.7 | 1 | |
| 18 | 1 | 0 | 0 | 0 | 0 | 0 | 0 | 22.0 | 17.0 | 0 | |
| 19 | 1 | 0 | 0 | 0 | 0 | 0 | 0 | 19.0 | 19.0 | 0 | |
| 20 | 1 | 0 | 0 | 0 | 0 | 0 | 0 | 20.0 | 22.0 | 0 | |
| 21 | 1 | 0 | 0 | 0 | 0 | 0 | 0 | 22.0 | 23.0 | 0 | |
| 22 | 1 | 0 | 0 | 0 | 0 | 0 | 0 | 16.0 | 15.0 | 0 | |
| 23 | 1 | 0 | 0 | 0 | 0 | 0 | 0 | 15.0 | 15.0 | 0 | |
| 24 | 1 | 0 | 0 | 0 | 0 | 0 | 0 | 19.0 | 18.0 | 0 | |
| 25 | 1 | 0 | 0 | 0 | 0 | 0 | 0 | 9.0 | 21.0 | 0 | |
| 26 | 1 | 0 | 0 | 0 | 0 | 0 | 0 | 15.0 | 16.0 | 0 | |
| 27 | 1 | 0 | 0 | 0 | 0 | 0 | 0 | 21.0 | 16.0 | 0 | |
| 28 | 2 | 0 | 0 | 0 | 0 | 0 | 0 | 22.5 | 20.0 | 0 | |
| 29 | 2 | 0 | 0 | 0 | 0 | 0 | 0 | 17.5 | 14.0 | 0 | |
| 30 | 2 | 0 | 0 | 0 | 0 | 0 | 0 | 19.0 | 16.0 | 0 | |
| 31 | 2 | 0 | 0 | 0 | 0 | 0 | 0 | 23.5 | 19.0 | 0 | |
| 32 | 2 | 0 | 0 | 0 | 0 | 0 | 0 | 21.5 | 21.5 | 0 | |
| 33 | 2 | 0 | 0 | 0 | 0 | 0 | 0 | 16.0 | 14.0 | 0 | |
| 34 | 2 | 0 | 0 | 0 | 0 | 0 | 0 | 17.0 | 19.0 | 0 | |
| 35 | 3 | 0 | 0 | 0 | 0 | 0 | 0 | 13.3 | 16.7 | 0 |
Team Ranking
Team Ranking Buddh Circuit
| Team | GP | 1st | 2nd | 3rd | Pod | Pole | FL | Avg Grid | Avg Pos | Points | |
|---|---|---|---|---|---|---|---|---|---|---|---|
| 1 | 3 | 3 | 0 | 1 | 4 | 3 | 1 | 1.8 | 5.0 | 102 | |
| 2 | 3 | 0 | 1 | 1 | 2 | 0 | 0 | 5.0 | 7.7 | 53 | |
| 3 | 3 | 0 | 1 | 0 | 1 | 0 | 1 | 5.8 | 6.2 | 56 | |
| 4 | 3 | 0 | 1 | 0 | 1 | 0 | 0 | 7.8 | 8.7 | 44 | |
| 5 | 2 | 0 | 0 | 1 | 1 | 0 | 1 | 10.3 | 6.5 | 29 | |
| 6 | 3 | 0 | 0 | 0 | 0 | 0 | 0 | 12.2 | 9.8 | 12 | |
| 7 | 3 | 0 | 0 | 0 | 0 | 0 | 0 | 12.8 | 13.3 | 5 | |
| 8 | 3 | 0 | 0 | 0 | 0 | 0 | 0 | 13.8 | 15.2 | 1 | |
| 9 | 3 | 0 | 0 | 0 | 0 | 0 | 0 | 14.2 | 17.7 | 1 | |
| 10 | 1 | 0 | 0 | 0 | 0 | 0 | 0 | 15.0 | 11.5 | 0 | |
| 11 | 1 | 0 | 0 | 0 | 0 | 0 | 0 | 21.5 | 19.5 | 0 | |
| 12 | 2 | 0 | 0 | 0 | 0 | 0 | 0 | 21.5 | 18.5 | 0 | |
| 13 | 2 | 0 | 0 | 0 | 0 | 0 | 0 | 23.0 | 19.8 | 0 | |
| 14 | 3 | 0 | 0 | 0 | 0 | 0 | 0 | 19.5 | 18.5 | 0 |


